

Capturing leads is only part of the job. You also need to assign each lead to the right person. You can create a queue for each lead source, but you can also use custom rules to assign leads automatically.
Distribution of employees responsible for leads
This example shows how to assign leads based on lead data instead of the source.
Bitrix24 pricing page
Create a workflow template
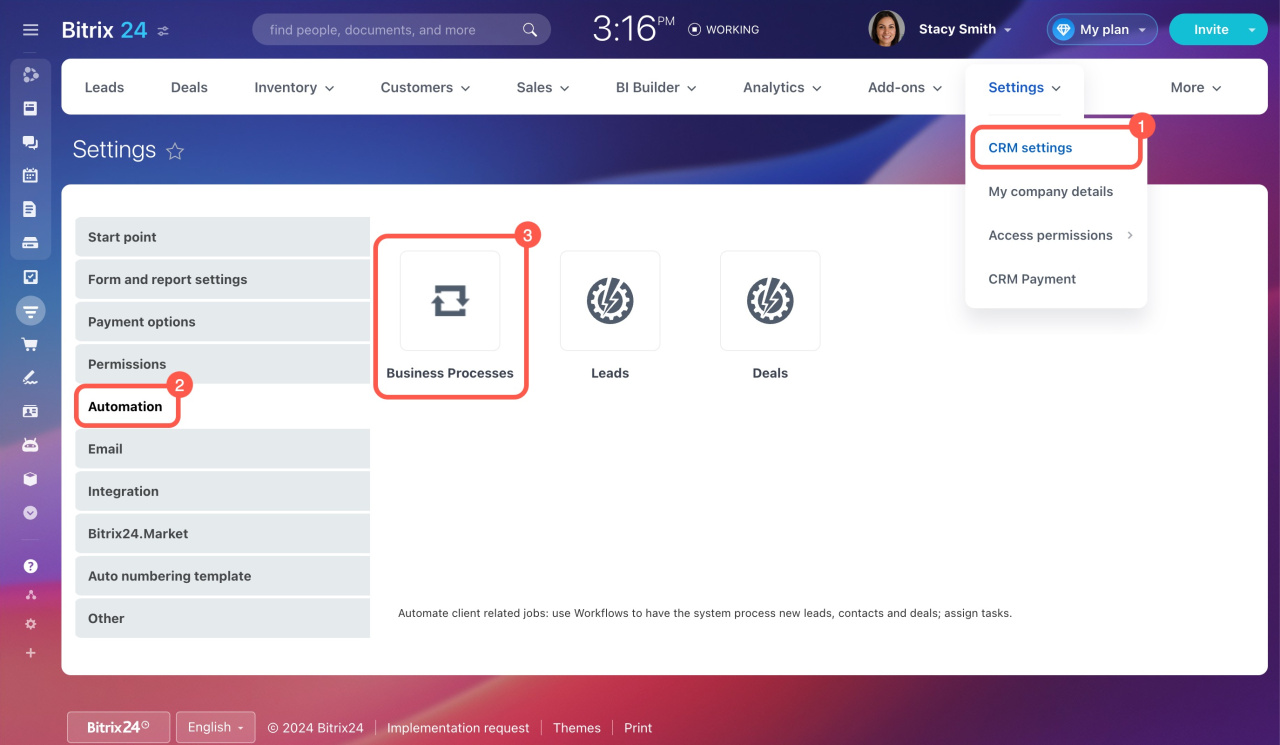
- Go to CRM > Settings > CRM settings.
- Open the Automation tab.
- Select Business Processes.
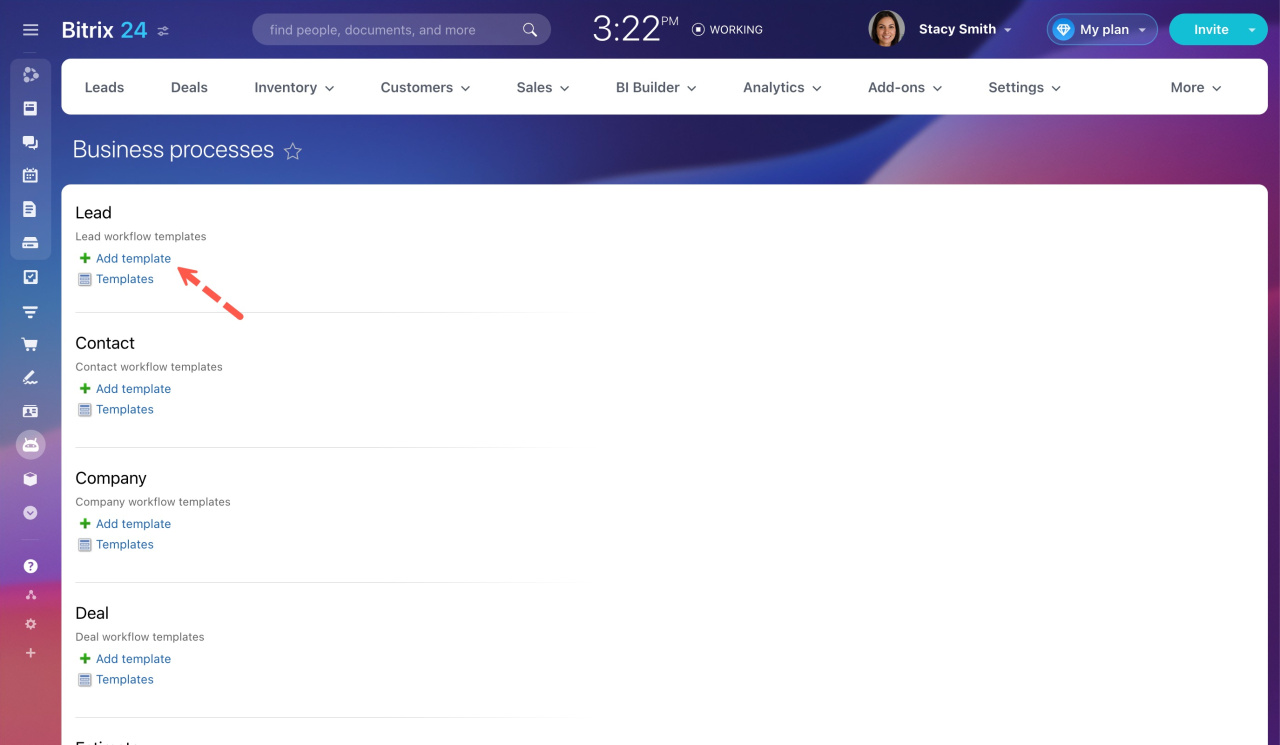
- Click Add template under Lead.
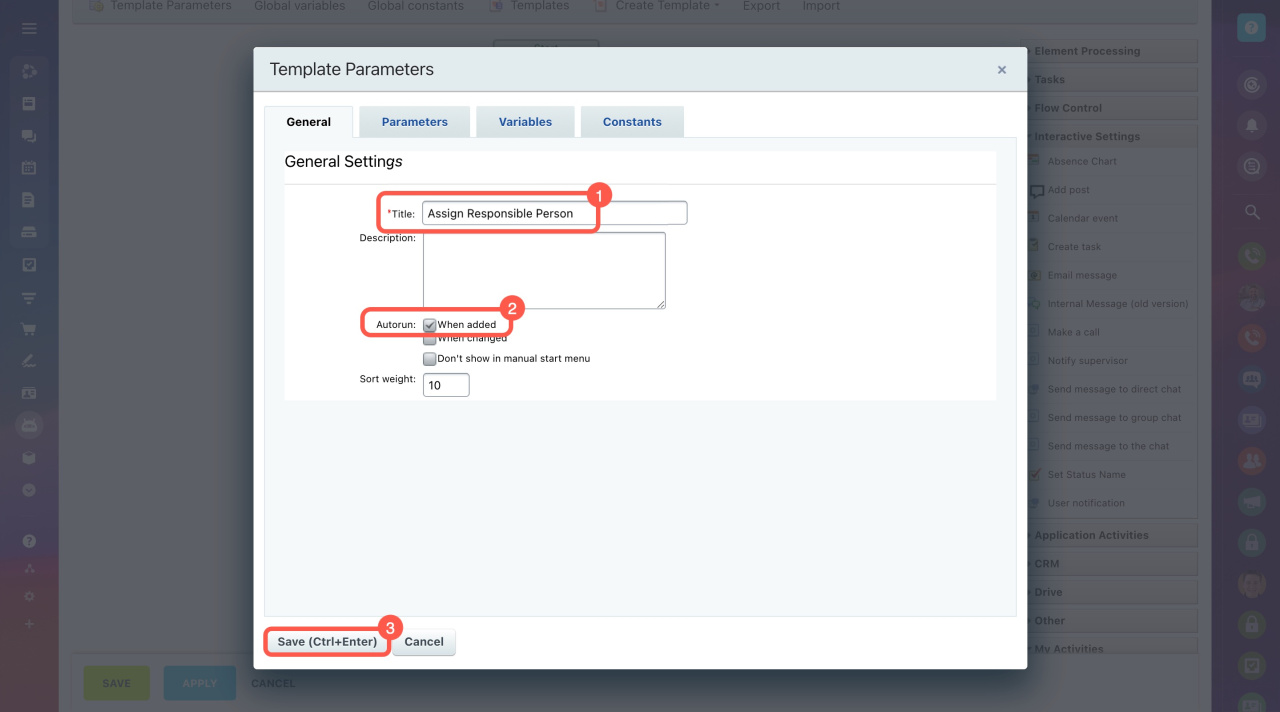
In the workflow designer:
- Enter a template name.
- Keep Autorun: when added enabled.
- Click Save.
"Autorun: when added" option in workflow templates
You can now build your workflow.
Add conditions
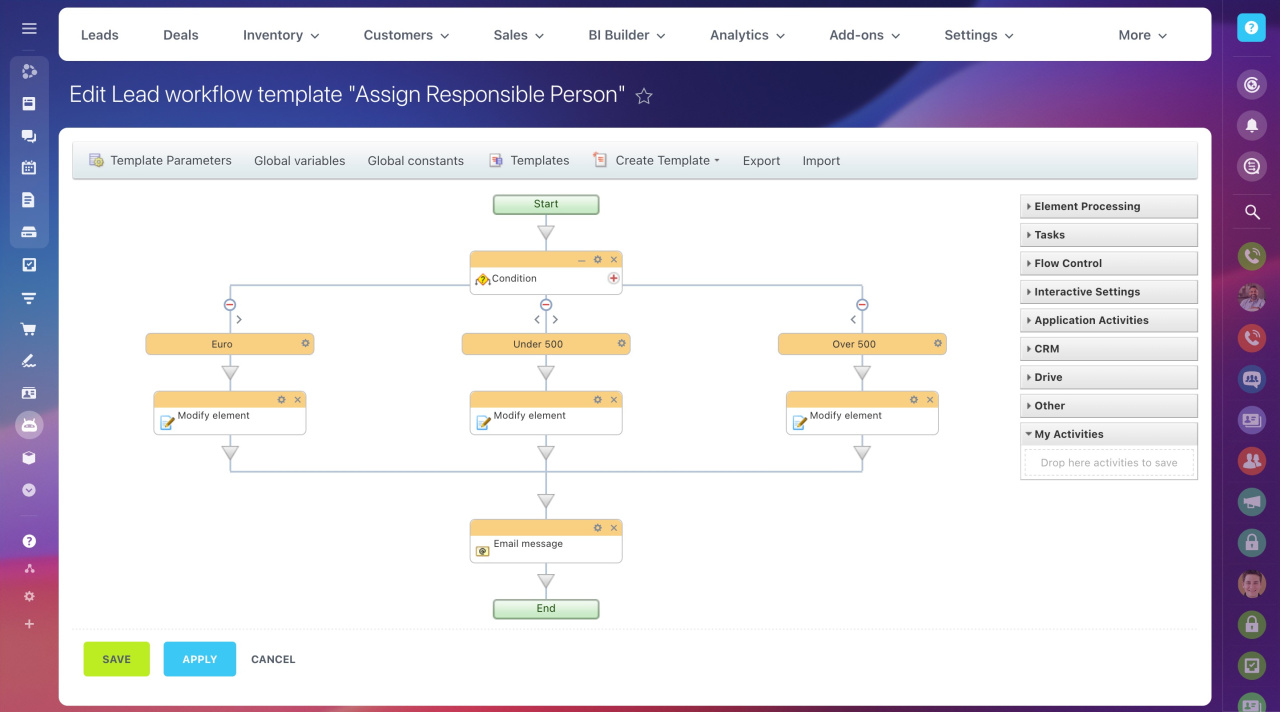
Add a Condition activity to define how leads are assigned.
In this example, leads are grouped by:
- Currency (EUR)
- Amount less than 500 EUR
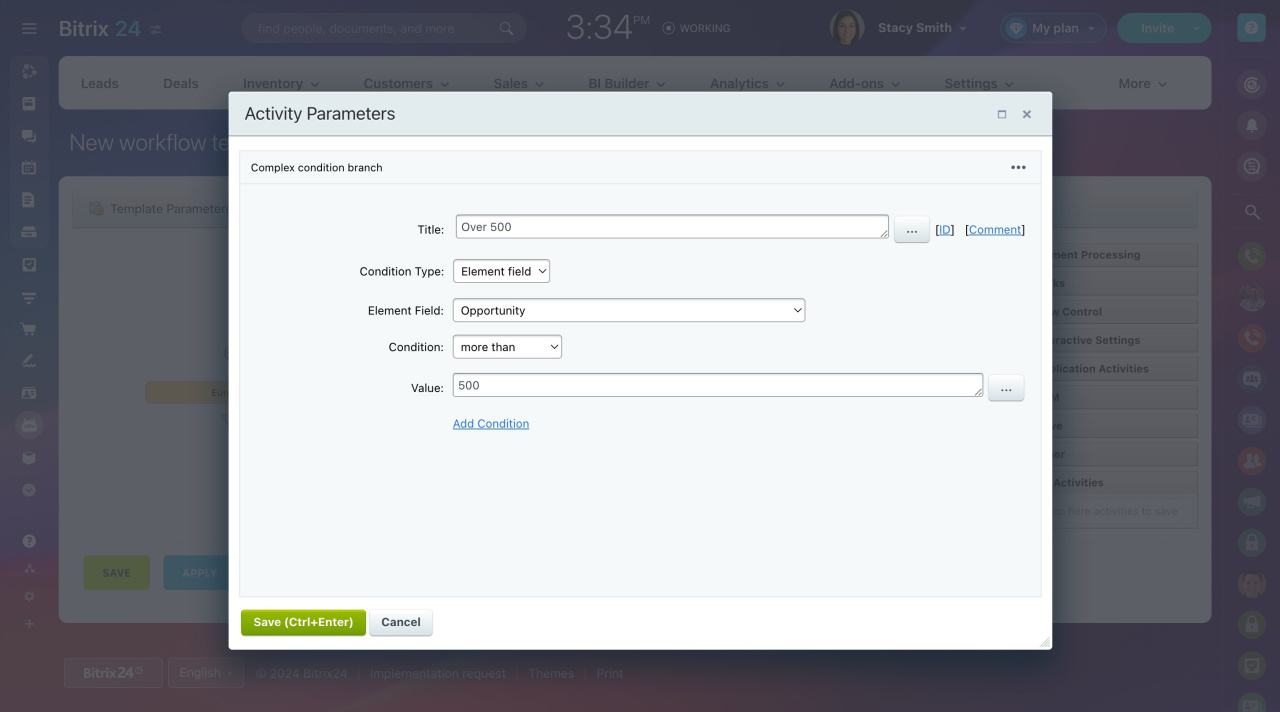
- Amount greater than 500 EUR
To configure a condition:
- Click the gear icon on the condition block.
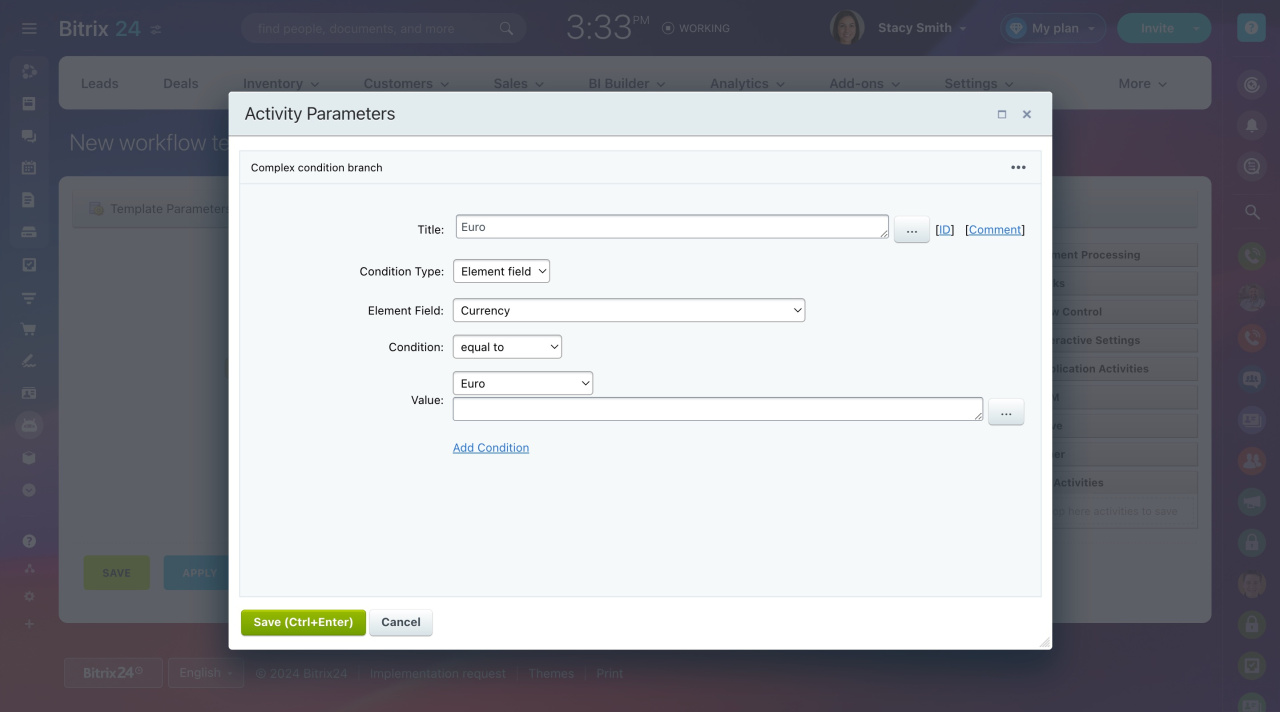
- Set the fields:
- Condition Type: Element field.
- Element Field: Select the lead field you want to check.
- Condition: Choose a rule (for example, Equal to).
- Value: Enter the value to compare.
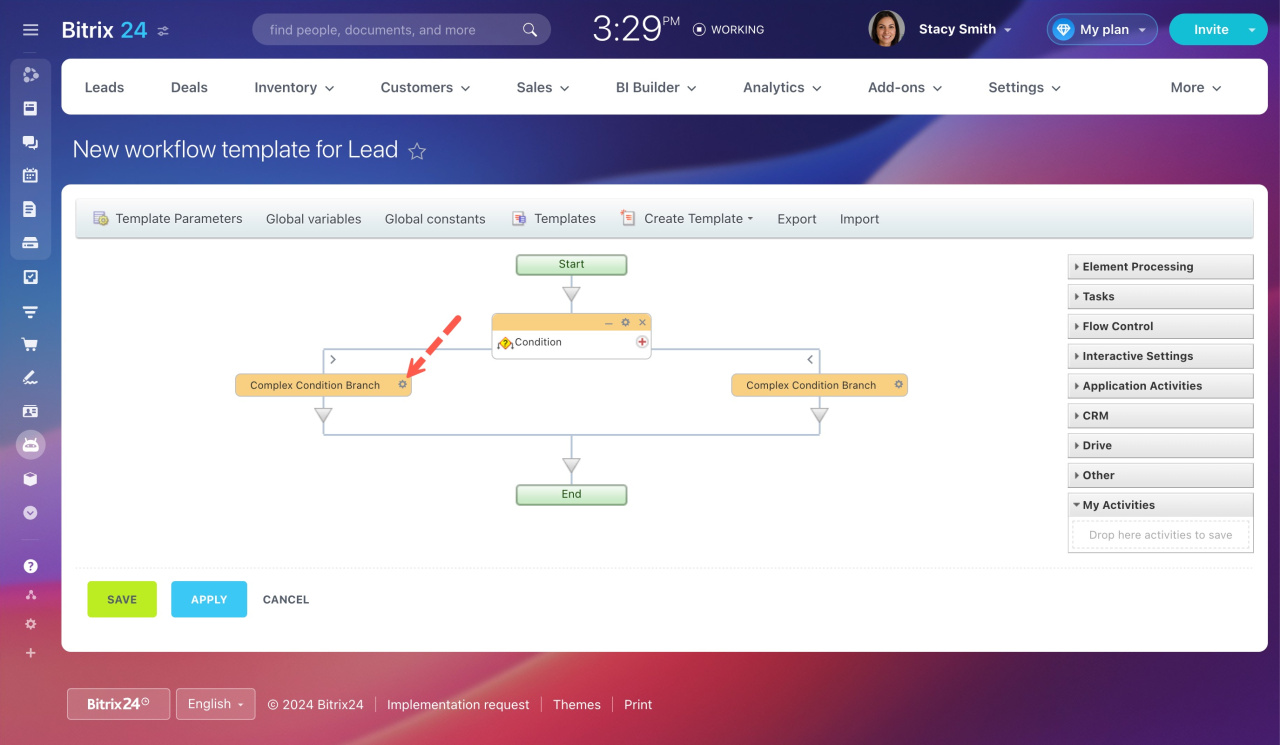
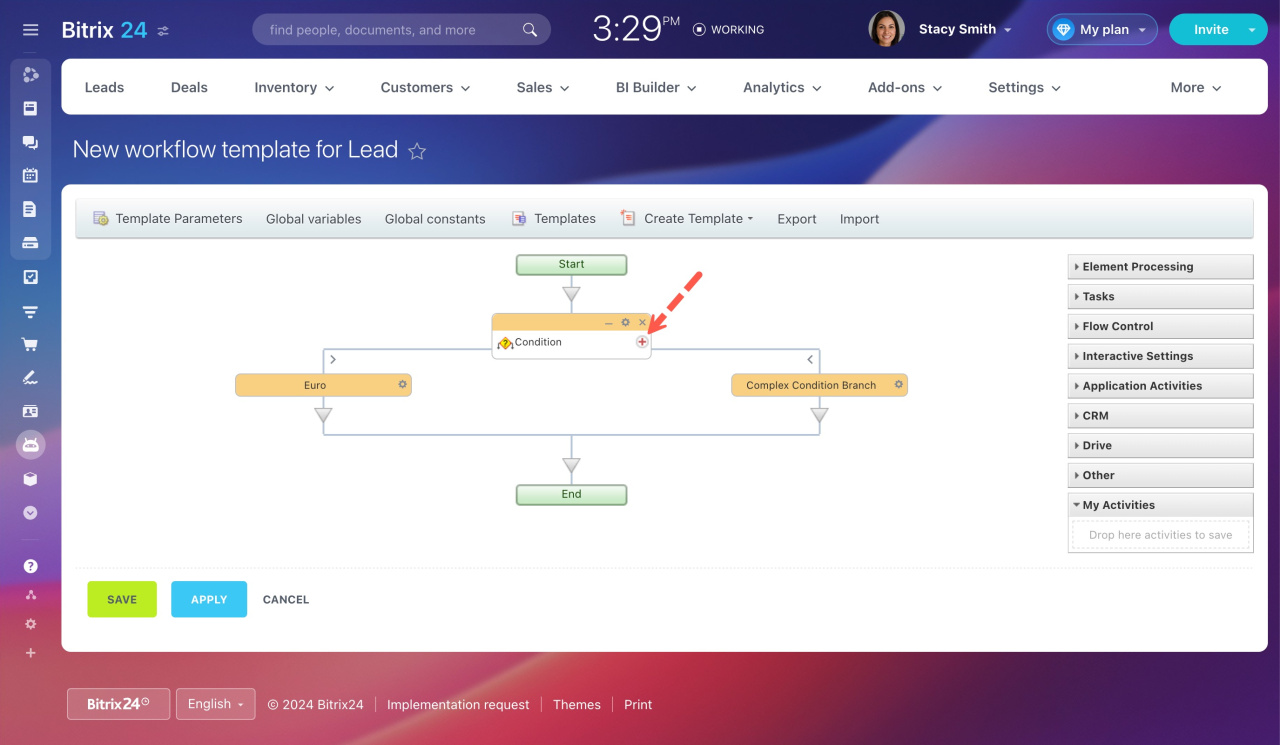
To add more branches, click + on the condition block. Create separate branches for:
- Amount less than 500 EUR
- Amount greater than 500 EUR
Assign the responsible person
Under each condition branch:
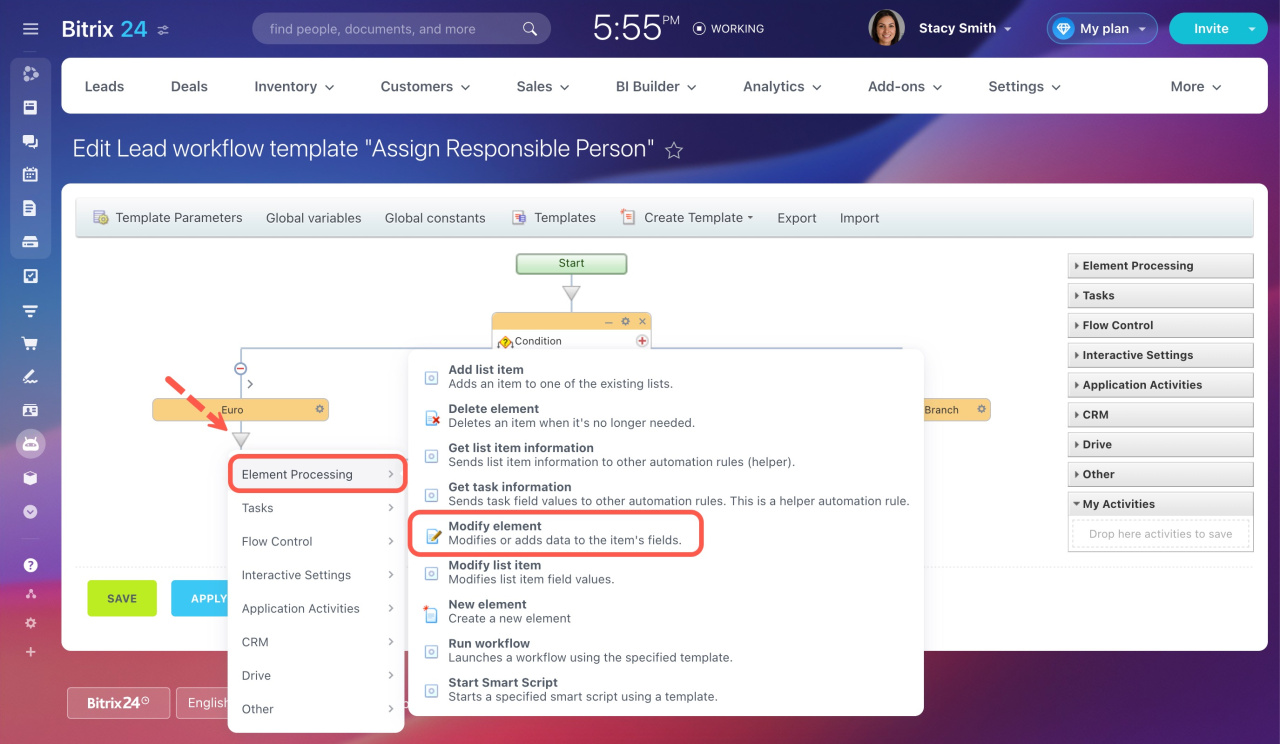
- Add a Modify element activity.
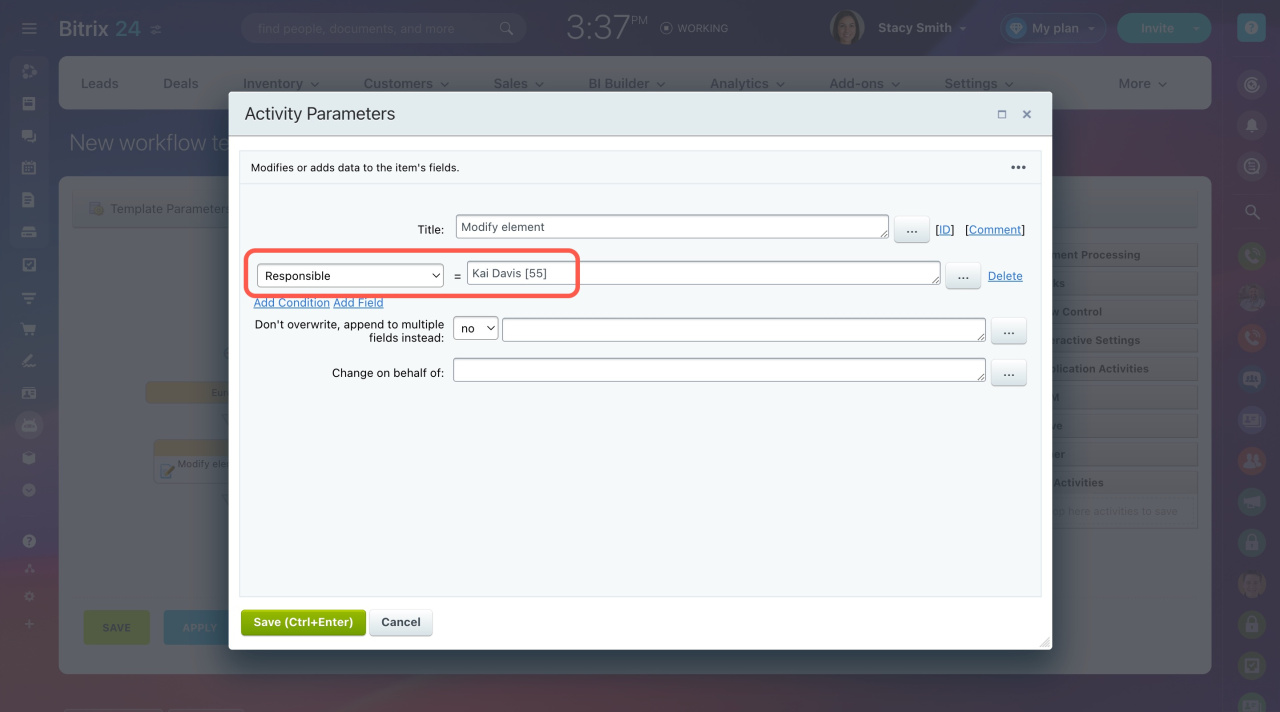
- Set the Responsible field to the correct user.
Send a notification email
After assigning the lead:
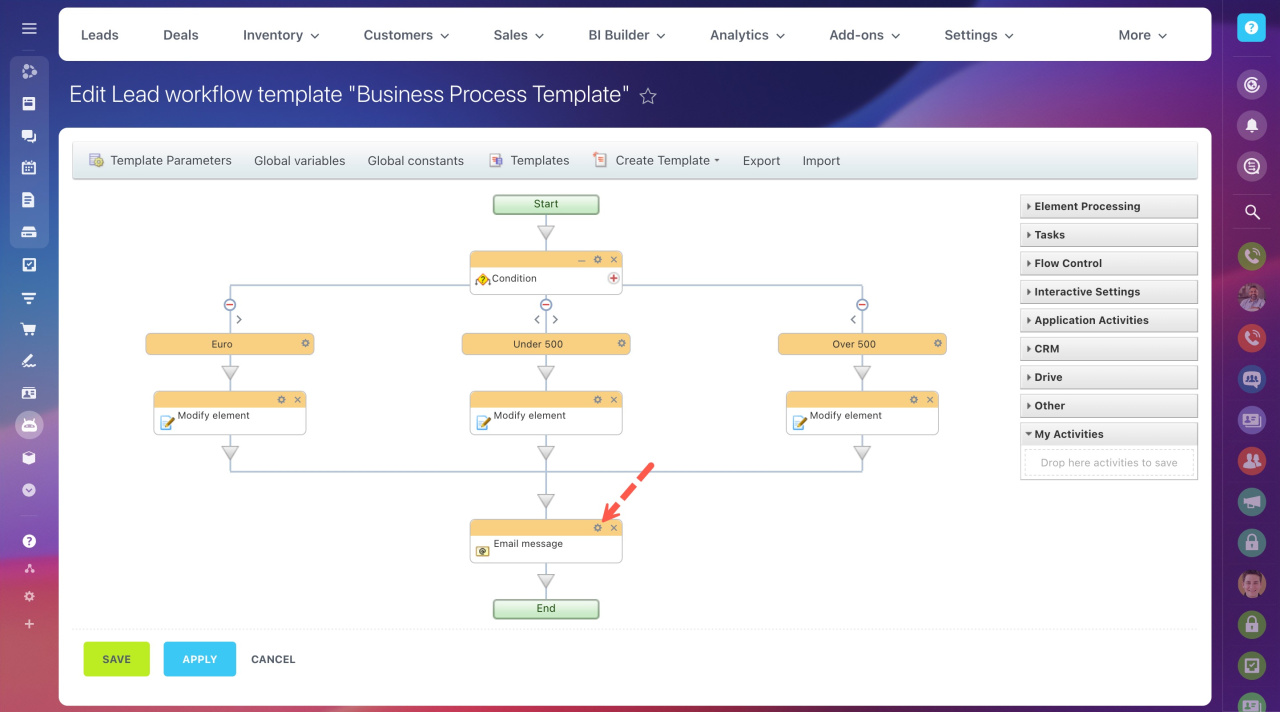
- Add an Email message activity.
- Open its settings.
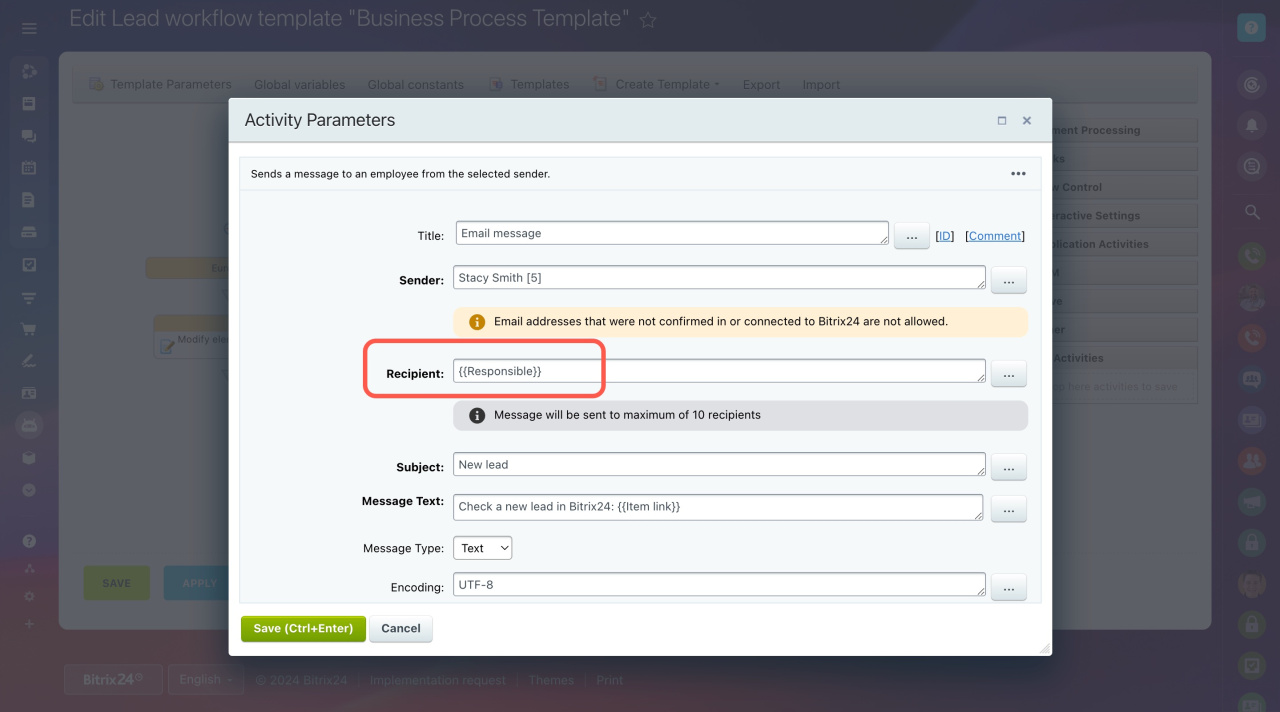
- Set Recipient to
{{Responsible}}.
This sends an email to the assigned user.
Finish setup
Save the workflow template.
Now, when a new lead is created:
- The system assigns it based on your conditions.
- The assigned user receives an email notification.